Logo

Logo
Welcome to your creativity!

Sunday, November 9, 2014

The Seat with Sass

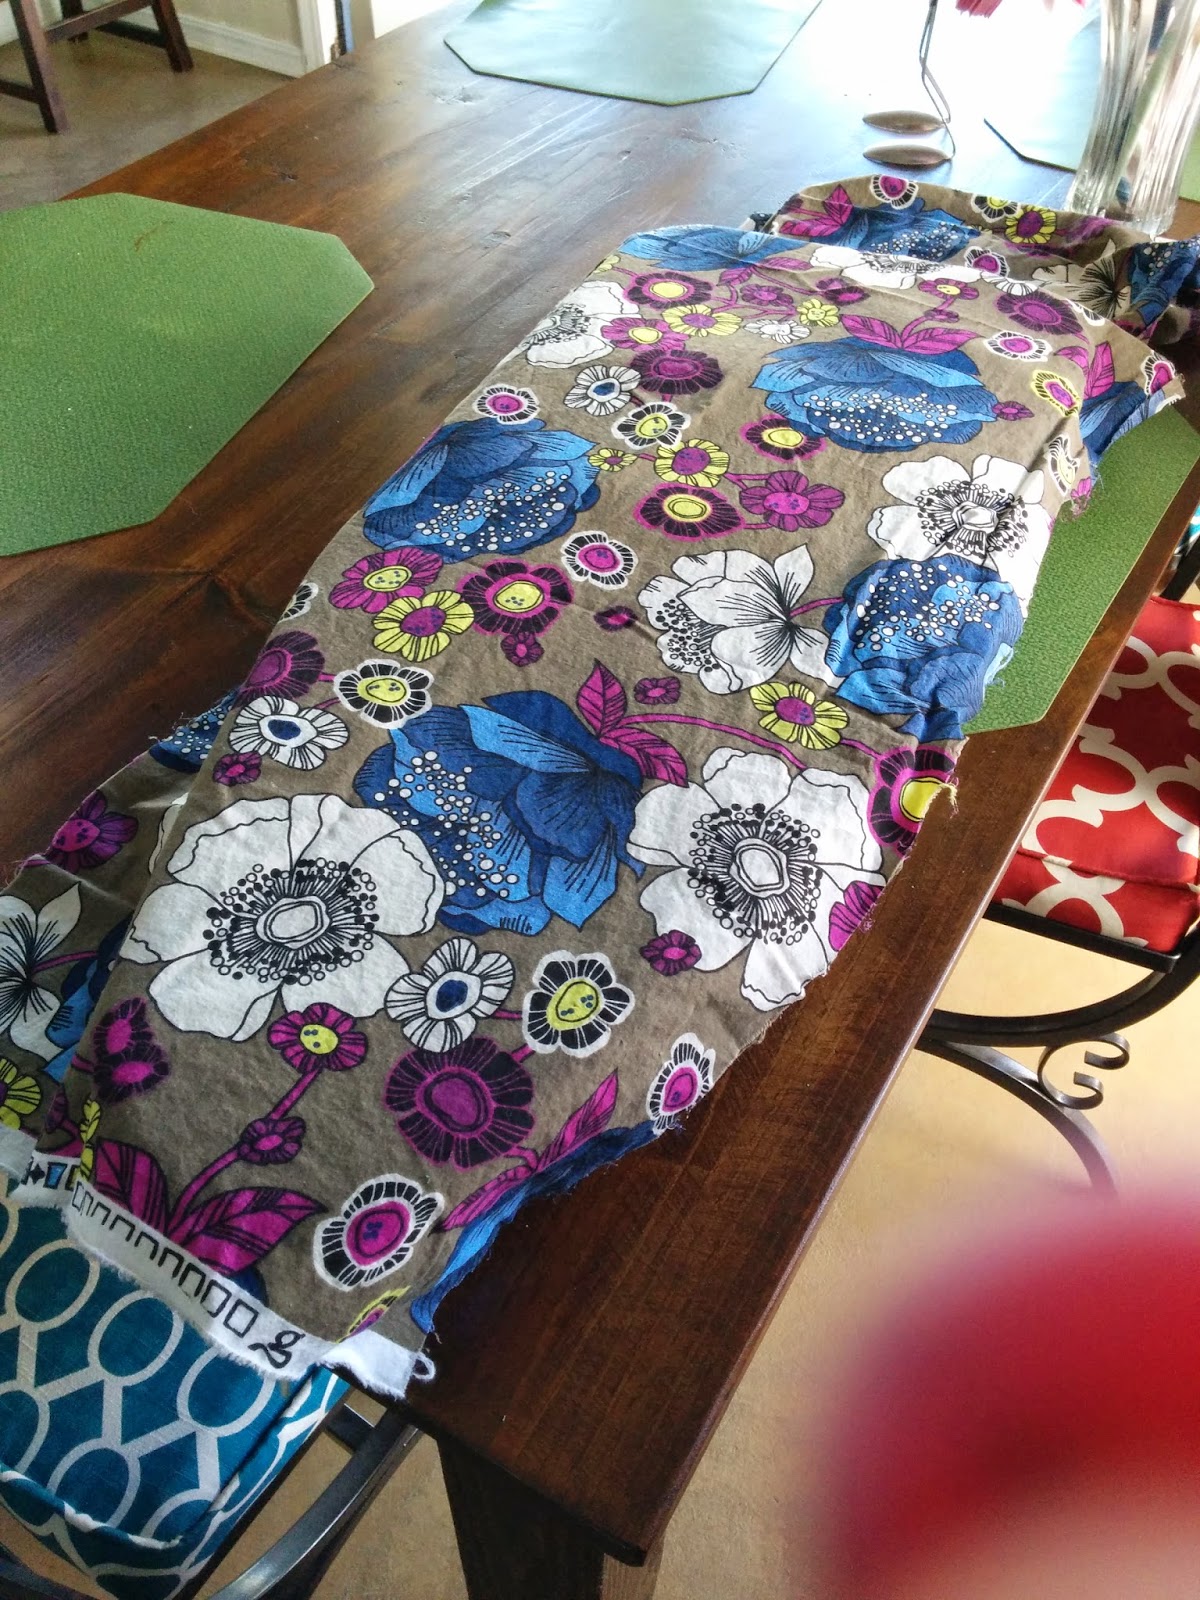
"Hello Lovely!" I said to this little bench when I first laid eyes on it at a garage sale. But of course, it was not this pretty at the time.
Before it's face lift and tummy tuck it looked more like this:


Now, I know what you are thinking: HOW DARE I THROW OUT THAT WONDERFUL FLORAL FABRIC?! Easy peasey. This girl needed some help to bring her into this century. So off came those staples!

Now the canvas underneath wasn't nearly as dreadful and relatively clean since the floral had a plastic (that's right) liner backing. Just imagine for a minute how that sounded EVERY time you had to sit down........ugh. But somewhat beneficial in our case. I use a multi-tool that has a flathead tool to pry up those staples and a set of needle nose pliers to rip those babies right out. Clean as needed (Which is usually constantly because getting stuff second hand generally means that it has had a battered past, of which you have little assurance that sterilization was the first owner's prime concern).

Next: get your foam ready. Since I kept the underlying padding in tact, I didn't need to get the heavy duty foam for cushions. I used a 1/2 inch thick foam sheet (also a garage sale find. I'm telling you, people will get rid of all kinds of useful things at fantastic prices- you just have to be willing to dig and keep your eyes open)

Lay your piece out on top of your foam and trace around it.
HLT: If you are starting with your new foam on top of just plain board than you will want to leave a 1/2 to 1 inch or so extra around your piece when you trace. Otherwise just trace the same size.


Next you would put a layer of batting on top of your foam cutting at least a 1/2 more on each side that the foam. I skipped this step because I thought it would be plenty soft already and I was going to double up my fabric anyways instead.


See the blue fabric above? (The one in the foam pic) that was some scrap fabric I had in my fabric stash that I thought would be handy. Since the pattern I selected for the top was primarily white I did not want the batting to show through. Especially when choosing a cotton fabric, you have to think about what is going behind it and also how to make it stronger. For this reason, I love to use canvas (or duck cloth) for reupholstering because of it's strength and durability. But I loved the pattern on this cotton and wanted to use it so I cut the blue fabric right along with the white and began to assemble it all upside down.

HLT: ALWAYS iron your fabric before putting it down to staple. This avoids the dreaded fight that will inevitably ensue when you staple, flip your piece over, then discover a wrinkle that will not stretch out. Save your self the aggrevation.

Start by stapling the middle of one side, then the opposite side, rotate, and do the other side all the while pulling the fabric taught. Flip piece over to make sure that the fabric is as tight as you would like it to be, then proceed moving around the piece in the same fashion, but moving outward toward the corners. Corners are last. They require folding fabric to get the right look before stapling. I did not get photos of this step because corners need all hands on deck, leaving none for picture taking.

Say goodbye to the (now) donated stapler who made this and a few other projects really difficult. Sights like the one above were a common occurrence. Many a staple have been wrenched out of this thing with a pair of pliers and my force of will. Sadly it made it's way out of my house after the 20th staple (in a row) jammed it self, yet again setting my intolerance for stupid things flailing. Online research proves fantastic when shopping for staplers! READ the customer comments :)

Finish stapling fabric!

The base is next. If there are any stability issues, now would be the time to fix them.

Otherwise start sanding.

 HLT: Buy the large sheets of sand paper and put duct tape on the back of them. Then cut out strips or shapes of your liking. This keeps the sand paper from curling or shredding in your hands.
Get it good and sanded, fine tuning and nicks or scratches.

Wipe all dust of  with damp cloth and allow to dry.

Painting time! My favorite part.


I used a Valspar Paint sample. You can have them color it to whatever shade you like or they have ready-made ones for only 3.00 each. Well worth it if you have a small project. Two coats did the trick
for this one.


I wanted an antique look to this so I grabbed a can of wood finish and started painting.

 So Staining goes like this: Paint on, wipe off, another stroke of stain, and more wiping off of said stain, etc..... Just keep slapping it on and taking it off until you are happy with your result.


 Attach new and improved top to base using small L-brackets. Drill your pilot holes first or you have a chance of splitting your piece.


 Screw into the top.


Turn over and enjoy!


Wednesday, November 5, 2014

Mirror, Mirror on the wall...

Emerald Green - It's a fabulous color! And one of my favorites! So when I was staring at this mirror trying to decide what color I wanted this color was of course, my first choice. However, I do not have a bunch of  emerald green all over my house, so I had to decide what I was going to do with it.


I was lucky enough to find this beauty at a garage sale. After negotiating $20 off the asking price I had to make room in the vehicle for it. I loved the  intricate pattern in it.


Clean up always comes in two places on redo pieces- before the work and after the work. So if this part scares you (tedious and annoying) then remaking old pieces is not for you. I would suggest getting a great job with a well off salary so that you might buy everything brand new and thus avoiding this step. However if the act of rolling up your sleeves and changing into those "craft pants" that have already been through the ringer a few times - excites you, then you are in the right place!

So, wipe down your mirror with a mild soap and water on just a plain rag and allow to dry. Since this mirror had so many little crevices there were tons of dust bunny and spiderweb hidey holes. This requires something more skillful to get it clean. Ta-da! A paint brush! (HLT) Use a dry paint brush to get into those tiny spaces that are unmanageable elsewise.

Next use child labor to help- Just kidding. My niece was over at the house and, pouting,  insisted that she was too little to be of any help to anyone. "Rubbish!" I cried and put her straight to work on the mirror with me. 

Do not think that you have to run out to your local craft store to get rolls of paper to tape your projects off. Nope sometimes, it just takes whatever you have handy and are willing to part with in the end to get the job done.

We used painters tape (plus some packaging tape when the painters tape proved to be unwilling to stay stuck down in spots) and plain ol' notebook paper. (yep, ripped each piece right out of that spirally thing.)


Didn't she do a wonderful job? Big help to her Auntie!

We made sure to get as close to the edges of the mirror as possible to minimize the cleanup later.
 
Next lay your Mirror down on top of a tarp or dropcloth, or in this case, an old blanket.

HLT: If you do not wish to spend the outrageous amount of money that they charge for good canvas, then hop on over to your closest thrift store where you can usually have your pick of old blankets or yardage of material to choose from, for very little moolah.
That way you can use it over and over and not feel a waste if you need to throw it out.

Now grab that can of exciting color, give it a good shake and start spraying your way into new creations!


As ALWAYS: Remember to use thin coats, multiple layers with drying time in between, to get the best result and avoid drips.

Make sure to move your piece around a bit to make sure you sprayed all angles and that the spray paint isn't sticking to your fabric (I mean, VERY EXPENSIVE DROP CLOTH) below.

Once dry, Hit it with a good coat of clear spray paint in whatever Matte your prefer. I like Satin.

Remove all of your paper and tape. If there is spray paint on the mirror surface, then you can either scrape it off with a flat razor blade or use a plastic scrubbie (NOT steel wool! Something soft but firm).


Finally: Find a Fabulous Place to hang your new Mirror!


Wednesday, October 29, 2014

Been a bit...

Sorry it's been a bit since my last creative outburst, but here soon I will have a few more completed projects to share.

I am SUPER excited that I have finished my entries and submitted my application for the OKC Beautiful Art in Recycled Trash Art Show! Three entries completed. Now I just have to wait each nail-biting minute to see if they are accepted! AHHHHHH!!! I can't wait! I really hope they are!

So until then I will continue to occupy my time making other things... So see ya soon.

Saturday, October 11, 2014

Spray paint Love

This is a video that I had to share. There are so many talented people who make their living doing something they love. I wish I had half of the talent this young man does.

But I will continue to share these amazing paintings with my online friends.

See the video.

Friday, October 10, 2014

TOP SECRET FILES - FOR YOUR EYES ONLY!

OK, so maybe not so top secret since this IS a blog and totally share-able, but that is the extent of my filing humor, so bare with me.

I found this two drawer filing cabinet at a garage sale one day and talked the guy down from $10 dollars to $5. *HLT: My garage saling philosophy is this: Never pay full price for anything unless it is already priced at a ridiculously good price. OR the garage sale is raising money for a great cause - Then it is fully acceptable. However, I feel that if the person selling will not let you have it for half of what your interested item is priced at - then they do not really want to let go of it - and you should walk away.

I am a penny pincher when it comes to things like that. This ensures that I do not blow a bunch of money that I do not have to blow, and if I know that I will walk away then I will not get roped into paying too much for something that I might regret later. Prime example: I bought a great pair of gold dress shoes for 50 cents. After wearing them for half a day - I decided that I would rather pull out my arm hairs than suffer anymore of the torturous blisters that those shoes had created. Lesson learned. I was super glad that I was only out two quarters.

Anywho: Back to the filing cabinet.

Step 1: Disassemble. Take out the drawers, remove all the hardware and lock. You will find that this is remarkably easy to do (at least on old filing cabinets). A couple of screws and the lock has a bracket that can be popped off, and VOILA! Take a bit of fine sand paper and lightly sand the entire surface. If there are any scratches, sand a bit further and try to smooth them out.

Step 2: Grab your favorite color of spray paint and give your piece a light coat for your first go round.
 HLT: Remember that it is better to take the time to make multiple coats instead of laying it on thick and having to deal with drips.
Wait for it to dry, then coat again. Repeat until your desired color is achieved.

Step 3: Fabric Overlay

Choose a fabric that is lightweight and easy to work with. I chose a cotton print that I had in my fabric stash. Make sure to iron out all of the wrinkles so that it will fall smoothly over the front of the drawers.

Next lay your fabric out and place drawer front down on top. Cut fabric leaving about 1/2 to 3/4 inch of fabric around all sides.


Modge Podge a good layer onto the front of the drawers. Then place fabric carefully on top, smoothing the fabric out as you go to get any bubbles of modge podge or wrinkles out.
*HLT: You a pampered chef scraper along the top to help with this step. They are super handy.

You will need to slit the fabric in order to fit properly around the back sides of your drawer. Make sure to lay down a thick layer around the edges and back where your fabric will connect. The corners might need a layer in between where you fold. I also give it a good coating over the top of the fabric on the back side to make sure it wasn't going to go anywhere.


Step 4: Spray paint your hardware with a coordinating color and let dry. These make take a couple coats as well. Don't forget to clear coat all your spray painted surfaces.
Step 5: Reassemble. Your drawers should slide right back into place. Reattach the hardware. The handles will simply screw back on putting a hole through the fabric where it belongs. The label holders will bend right back in after you make a small slit using a exacto knife. Once through, you will bend the prongs to either side against the metal. I did not put the lock back in because mine did not come with a key, so the fabric covered the hole nicely.


You could choose to paint the insides if you wish, but I chose not to. There are filing stand that you can buy to place in the drawers that will hold files. They are relatively inexpensive.

But now you have a one of a kind filing cabinet that will brighten up any old office! This one in particular is getting donated to my Niece's PTA Silent Auction. Hopefully someone will love it as much as I do.


Junk Hippy Show Inspirations!

The Show was great! It was the entire Cox Building at the OKC Fair Grounds. If you missed it this year, it will be back same time next year, and you should definately check it out.

I found some lovely new treasures and some great inspiration ideas! Here are just a few:


This Lady creates some awesome art using old water faucets! That's upcycling at it's best. People are so creative!


 Some of these came from The Funky Trunk Marketplace at 3031 NW 23rd St., Oklahoma City, which is a fabulous little shopping place with all kinds of vendors with different FABULOUS TALENTS.

My buddy Heather found some great Thunder Decor for her room, and Taylor got an adorable deco-style necklace to match with all of her outfits.

But the furniture was amazing! So many talented artists out there. Just LOOK at these colors!

Makes me want to break out the furniture stain. So now I am on the hunt for some great pieces to redo. I foresee future thrift store outings along with that headshake and look that my husband gets whenever something new shows up magically in the garage. :)